Osmo Hardwax Oil is a popular choice among homeowners, woodworkers, and DIY enthusiasts for enhancing and protecting wooden surfaces. However, with multiple variations available, it can be overwhelming to determine which Osmo Hardwax Oil is best suited for your specific needs. In this blog post, we will guide you through the process of selecting the appropriate Osmo Hardwax Oil and provide easy-to-follow steps for its application. By the end, you’ll be equipped with the knowledge and confidence to beautify your wooden surfaces with Osmo Hardwax Oil.
Choosing the Right Osmo Hardwax Oil:
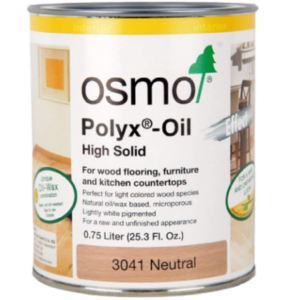
1. Determine the Wood Species: Osmo offers different Hardwax Oil formulations based on the type of wood you’re working with. For common domestic species like oak or pine, Osmo Polyx-Oil is a suitable choice. If you’re dealing with exotic or oily woods, consider using Osmo Wood Wax Finish Extra Thin.
2. Consider the Desired Finish: Osmo Hardwax Oils come in a range of finishes, including satin, matte, and gloss. Think about the look you want to achieve and choose the appropriate finish accordingly.
3. Assess the Application Method: Osmo offers Hardwax Oils that are designed for specific application methods. For manual application, Osmo Polyx-Oil Original is the go-to choice.
Easy Steps for Applying Osmo Hardwax Oil:
Before applying Osmo Hardwax Oil, ensure that the wood surface is clean, dry, and free of any contaminants, such as dust or grease. Sand the surface if necessary, following the wood grain, to achieve a smooth finish. Use a vacuum or a tack cloth to remove any sanding residue.
Step 2: Application
1. Stir the Osmo Hardwax Oil thoroughly to ensure an even distribution of pigments and oils.
2. Apply the first coat of Osmo Hardwax Oil using a natural bristle brush, roller, or cloth, depending on the size and intricacy of the surface. Work in manageable sections, following the wood grain.
3. Allow the first coat to penetrate the wood for approximately 20 minutes. If the oil is absorbed quickly, you can apply a second coat immediately.
4. After the specified absorption time, remove any excess oil by wiping the surface with a lint-free cloth, ensuring a thin and even layer remains.
5. Let the first coat dry for a minimum of 8-10 hours. Ensure proper ventilation during the drying process.
6. Apply subsequent coats following the same process as the first coat. For most applications, two to three coats are sufficient. However, you can add more coats for increased durability and a deeper finish.
7. Between coats, lightly sand the surface using fine-grit sandpaper (e.g., 240 grit) to create a smooth surface for the next application. Remove sanding residue with a vacuum or tack cloth before proceeding.
8. After applying the final coat, allow the surface to dry completely for at least 24 hours before subjecting it to regular use or foot traffic.
Step 3: Maintenance and Care
To maintain the beauty and durability of your Osmo-treated wood, regularly clean the surface with a mild, pH-neutral cleaner and a soft cloth or mop. Avoid using harsh chemicals or abrasive cleaners that may strip away the protective finish. If the surface starts to show signs of wear over time, you can easily refresh it by applying a thin maintenance coat of Osmo Hardwax Oil.
Conclusion:
Choosing the right Osmo Hardwax Oil for your wooden surfaces is crucial for achieving the desired results. By considering factors like wood species, desired finish, application method, and environmental conditions, you can make an informed decision. Following the easy steps outlined above, you can confidently apply Osmo Hardwax Oil and enjoy the benefits of its enhanced beauty and protection for your wood projects.