Woodworking enthusiasts and craftsmen have long marveled at the beauty of timber. Its natural grains and patterns can create stunning pieces of art and furniture. However, working with wood often involves dealing with voids, cracks, and imperfections. Thankfully, there’s a versatile and efficient solution to this problem: Starbond CA glue and accelerator. In this DIY guide, we’ll explore how to use these products to turn timber flaws into stunning features.
What is Starbond CA Glue and Accelerator?
Before diving into the woodworking magic of using Starbond CA glue and accelerator to fill voids and cracks in timber, let’s understand what these products are.
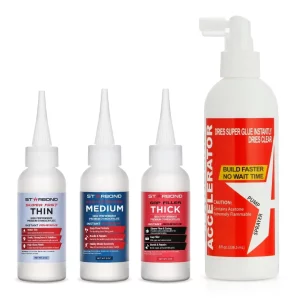
Starbond CA Glue: CA stands for Cyanoacrylate, which is commonly known as super glue. Starbond CA glue is renowned for its exceptional bonding capabilities and versatility. It comes in various viscosities, making it suitable for a wide range of applications, including woodworking.
Starbond Accelerator: This is a complementary product used in conjunction with CA glue. The accelerator helps CA glue cure (harden) almost instantly when applied, making it perfect for filling voids and cracks in wood.
Preparing Your Workstation
Before you begin any woodworking project with CA glue and accelerator, it’s essential to set up a clean and organized workstation. Here are some tips:
- Safety First: Wear safety goggles, gloves, and work in a well-ventilated area. CA glue and accelerator can be irritating to the eyes and skin.
- Clean the Wood: Ensure that the wood surface is free from dust, dirt, and any finish. A clean surface promotes better adhesion.
- Gather Your Tools: You’ll need Starbond CA glue, Starbond Accelerator, sander and sandpaper.
Filling Voids and Cracks
Step 1: Choose the Right Viscosity
Selecting the appropriate CA glue viscosity is crucial for successful void and crack filling. Here’s a general guideline:
- Thin CA Glue: Use for filling hairline cracks and small voids.
- Medium CA Glue: Suitable for filling larger gaps and voids.
- Thick CA Glue: Ideal for filling substantial cracks and voids.
Step 2: Prep the Void or Crack
Clean out any loose debris or dirt from the void or crack using a brush or compressed air. Ensure that the area is dry and free of dust.
Step 3: Apply the CA Glue
Apply the chosen viscosity of CA glue into the void or crack. It’s essential to be precise, as CA glue sets quickly. Fill the void slightly higher than the surface to allow for sanding later.
Step 4: Use Accelerator
Spray or apply the Starbond Accelerator onto the CA glue. The accelerator will cause the glue to harden almost instantly, so be prepared for a rapid reaction.
Step 5: Sand and Finish
Once the glue has cured, sand the surface smooth. Start with a coarse grit sandpaper and gradually move to finer grits. This process will blend the repaired area seamlessly with the surrounding wood.
Tips and Tricks
- Test First: Before applying CA glue and accelerator on your project, it’s a good practice to test the process on a scrap piece of wood to get a feel for the timing and technique.
- Tinted CA Glue: You can add wood dust or a tint to the CA glue to better match the color and grain of the timber, making the repair less conspicuous.
- Avoid Over-saturation: While it’s tempting to fill large voids or cracks in one go, it’s better to layer the CA glue, allowing each layer to cure before applying the next.
- Precision is Key: When using CA glue and accelerator, remember that it sets quickly. Be precise and deliberate in your application.
Conclusion
Starbond CA glue and accelerator are indispensable tools for any woodworker looking to turn timber imperfections into captivating features. By following these simple steps and tips, you can achieve professional-grade results in your DIY projects. So, the next time you encounter voids or cracks in your timber, reach for Starbond CA glue and accelerator and transform your woodworking endeavors into works of art. Happy woodworking!